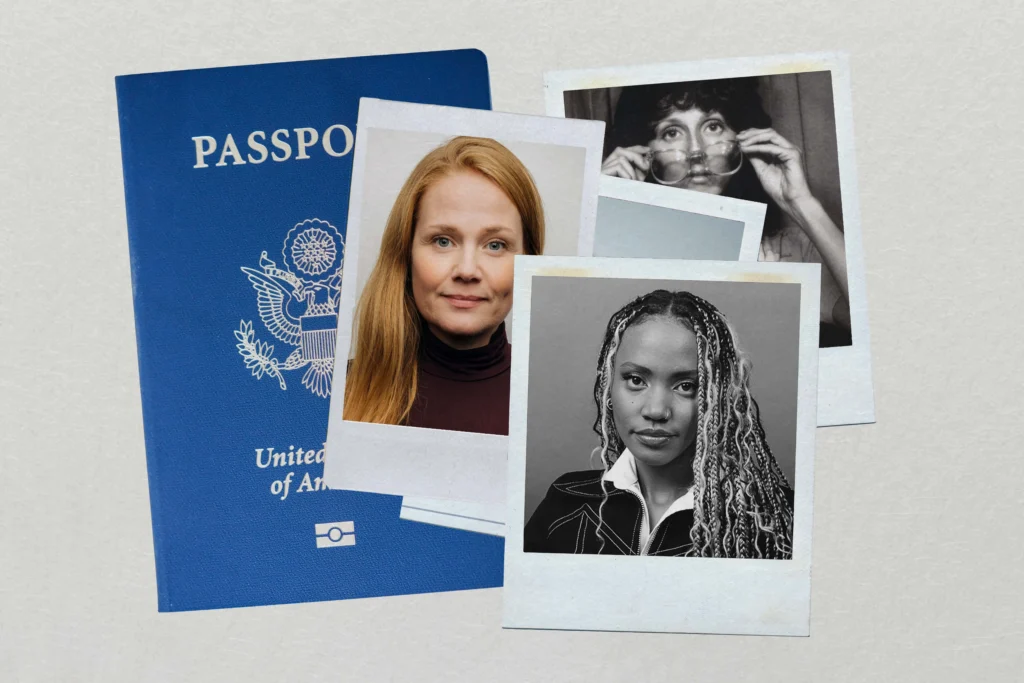
Applying for a passport should be a simple process. Yet thousands of applications are delayed every year because of one surprisingly common issue: rejected passport photos.
Many people spend hours filling out forms, gathering documents, and paying fees, only to discover that their passport application has been put on hold because their photo doesn’t meet official requirements. It can be frustrating, time-consuming, and expensive. The good news is that most passport photo rejections are completely avoidable.
If you’ve ever wondered why passport photos get rejected or how to make sure yours gets approved on the first attempt, this guide covers everything you need to know. From lighting mistakes to incorrect facial expressions, we’ll break down the most common problems and provide practical solutions.
Why Passport Photos Matter So Much
A passport photo is more than just a picture. It serves as a critical part of your identity verification process. Government agencies use passport photos to confirm who you are and ensure your passport matches your appearance.
Modern biometric systems rely heavily on photo accuracy. Even small mistakes can interfere with facial recognition technology, leading authorities to reject the image.
Because of this, passport photo requirements are often stricter than people expect. A photo that looks perfectly fine on social media or a driver’s license application may not meet passport standards.
The Most Common Reasons Passport Photos Get Rejected
Understanding the most common causes of rejection is the first step toward getting approved.
Incorrect Photo Size
One of the biggest reasons passport photos fail inspection is incorrect dimensions.
Every country has specific passport photo size requirements. Even being slightly outside the acceptable measurements can result in rejection.
Common issues include:
- Photo cropped too tightly
- Excessive space above the head
- Incorrect aspect ratio
- Improper head positioning
- Image resized incorrectly
Before printing or uploading your passport photos, always verify the exact size specifications required by the issuing authority.
Poor Lighting Conditions
Lighting plays a major role in passport photo approval.
Many applicants take photos in dim rooms or under harsh overhead lights. This creates shadows that obscure facial features.
Problems caused by poor lighting include:
- Shadows on the face
- Uneven skin tones
- Overexposed areas
- Underexposed details
- Glare from glasses
Natural daylight often provides the best results when taking passport photos. Position yourself facing a window while avoiding direct sunlight.
Wrong Background Color
Background requirements are surprisingly strict.
Most passport authorities require:
- Plain white background
- Light-colored background
- Uniform backdrop
- No patterns
- No visible objects
A cluttered room, painted wall, or textured surface can cause passport photos to be rejected immediately.
How to Fix Background Issues
If you’re taking photos at home:
- Use a plain white sheet
- Stand in front of a clean white wall
- Remove decorations from view
- Avoid shadows on the backdrop
A simple background dramatically improves approval chances.
Incorrect Facial Expression
Many people don’t realize facial expressions matter.
Passport photos typically require:
- Neutral expression
- Closed mouth
- Eyes open
- Direct eye contact with camera
Common mistakes include:
- Smiling too broadly
- Raising eyebrows
- Squinting
- Looking away
- Frowning
A natural, relaxed expression is usually the safest choice.
Problems with Glasses and Eyewear
In many countries, glasses are no longer allowed in passport photos except for specific medical reasons.
Even when permitted, glasses can create issues such as:
- Lens glare
- Reflection
- Obstructed eyes
- Distorted facial features
If possible, remove glasses before taking passport photos.
Sunglasses Are Almost Always Prohibited
Sunglasses create immediate rejection risks because they hide important biometric features.
Avoid:
- Tinted lenses
- Dark glasses
- Fashion eyewear
- Reflective lenses
Authorities must clearly see your eyes for identity verification.
Headwear and Accessories Mistakes
Another common reason passport photos fail inspection involves head coverings.
Most passport regulations prohibit:
- Baseball caps
- Fashion hats
- Headbands
- Decorative accessories
- Costume items
Religious head coverings are usually allowed, provided they do not obscure facial features.
Jewelry Can Also Cause Problems
While small jewelry items are generally acceptable, large accessories may interfere with photo requirements.
Examples include:
- Oversized earrings
- Large necklaces
- Decorative face jewelry
- Reflective accessories
When taking passport photos, simplicity is best.
Hair Covering the Face
Your facial features must be fully visible.
Hair-related issues include:
- Hair covering eyes
- Bangs obstructing eyebrows
- Strands crossing the face
- Excessive volume creating shadows
Tie back long hair if necessary and ensure both eyes are completely visible.
Blurry or Low-Quality Images
Image quality is another major reason passport photos get rejected.
Government agencies expect:
- Sharp focus
- High resolution
- Clear facial details
- Proper color balance
- No pixelation
Common quality issues include:
| Problem | Effect |
|---|---|
| Motion blur | Facial details unclear |
| Low resolution | Pixelated image |
| Camera shake | Loss of sharpness |
| Poor focus | Biometric failure |
| Compression artifacts | Reduced image quality |
How to Improve Photo Quality
For better passport photos:
- Use a modern camera or smartphone
- Clean the camera lens
- Use a tripod when possible
- Ensure adequate lighting
- Take multiple shots
The clearer the image, the better the chance of approval.
Digital Passport Photo Errors
Online passport applications have become increasingly common.
However, digital submissions introduce additional risks.
File Format Problems
Authorities often require specific formats such as:
- JPEG
- JPG
- PNG
Submitting the wrong file type may trigger automatic rejection.
Incorrect File Size
Many systems impose minimum and maximum file size limits.
Common digital mistakes include:
- Oversized files
- Excessive compression
- Low-resolution uploads
- Cropped images
Always review technical requirements before uploading passport photos.
Editing and Filters Can Cause Rejection
Modern smartphones offer countless editing tools, but most should never be used for passport photos.
Avoid:
- Beauty filters
- Skin smoothing
- Face reshaping
- Color enhancements
- AI-generated retouching
Authorities want an accurate representation of your appearance.
Why Filters Are a Bad Idea
Even subtle edits can:
- Alter facial geometry
- Affect biometric analysis
- Reduce authenticity
- Trigger rejection
Leave your passport photos unedited whenever possible.
Incorrect Head Position
Positioning matters more than many applicants realize.
Your head should generally be:
- Centered
- Facing forward
- Level with camera
- Straight posture
- Fully visible
Common positioning errors include:
- Tilting head
- Turning sideways
- Looking up
- Looking down
- Leaning
Imagine looking directly at a passport officer standing in front of you.
Children’s Passport Photos Get Rejected Too
Parents often face unique challenges when taking passport photos for infants and children.
Common issues include:
- Child looking away
- Closed eyes
- Visible toys
- Parent appearing in frame
- Motion blur
Tips for Children’s Passport Photos
To improve success:
- Photograph when the child is calm.
- Use good natural lighting.
- Remove distracting objects.
- Take multiple shots.
- Keep the background plain.
Patience often makes all the difference.
Clothing Mistakes That Lead to Rejection
Although clothing rules are generally flexible, certain outfits can cause problems.
Avoid:
- Uniforms
- Camouflage clothing
- Costumes
- Clothing matching background color
Choose everyday attire that contrasts slightly with the backdrop.
Best Clothing Choices
Suitable options include:
- Solid-colored shirts
- Casual tops
- Simple blouses
- Non-reflective fabrics
Keep the focus on your face rather than your wardrobe.
Understanding Biometric Requirements
Modern passport photos are assessed by both humans and computer systems.
Biometric checks evaluate:
- Eye placement
- Facial symmetry
- Head size ratio
- Image clarity
- Lighting consistency
A photo may appear acceptable to you but still fail automated verification.
That’s why following official passport photo requirements precisely is essential.
DIY Passport Photos vs Professional Services
Many people wonder whether they should take passport photos at home or visit a professional studio.
Advantages of Professional Passport Photos
Professionals typically understand:
- Government regulations
- Background requirements
- Lighting standards
- Cropping guidelines
- Digital submission rules
This can significantly reduce rejection risk.
Advantages of Taking Passport Photos at Home
Home photography offers:
- Convenience
- Lower cost
- Immediate retakes
- Flexible scheduling
With proper preparation, DIY passport photos can be just as successful.
A Quick Passport Photo Checklist
Before submitting your application, review this checklist.
Photo Requirements Checklist
- Neutral facial expression
- Eyes fully visible
- Plain white background
- Correct photo dimensions
- Proper head positioning
- No shadows
- No filters
- Sharp focus
- High resolution
- Appropriate clothing
- No prohibited accessories
- Current appearance
If every item is checked, your passport photos are much more likely to be accepted.
How to Fix Rejected Passport Photos
Receiving a rejection doesn’t mean starting from scratch.
Follow these steps:
Step 1: Read the Rejection Notice
Authorities usually explain why passport photos were rejected.
Identify whether the issue involves:
- Size
- Background
- Lighting
- Quality
- Expression
Step 2: Correct the Specific Problem
Avoid retaking the same photo without addressing the original issue.
For example:
- Improve lighting if shadows were present.
- Use a white background if the backdrop failed.
- Remove glasses if glare caused rejection.
Step 3: Verify Requirements Again
Passport standards occasionally change.
Double-check:
- Image dimensions
- Resolution requirements
- Submission guidelines
- Biometric specifications
Step 4: Submit a New Photo
Once corrections are made, upload or print a new image that fully complies with current standards.
Frequently Overlooked Passport Photo Mistakes
Some mistakes are surprisingly easy to miss.
These include:
- Red-eye effect
- Visible headphones
- Hair accessories
- Colored contact lens glare
- Wrinkled backgrounds
- Digital artifacts
- Crooked cropping
- Uneven lighting
Taking a final careful review can prevent unnecessary delays.
Final Thoughts
Rejected passport photos are far more common than most people realize. Fortunately, the majority of problems stem from simple mistakes that can be fixed quickly. Whether it’s poor lighting, an incorrect background, blurry image quality, or a facial expression that doesn’t meet guidelines, understanding the requirements dramatically improves your chances of approval.