
A chocolate fountain has a way of turning an ordinary gathering into something memorable. Whether it’s a birthday party, wedding reception, holiday celebration, baby shower, anniversary, or family get-together, the sight of warm, flowing chocolate instantly attracts everyone to the dessert table.
Yet, many people discover that using a chocolate fountain isn’t quite as simple as plugging it in and pouring in melted chocolate. Chocolate that refuses to flow, clogged tiers, thick mixtures, or messy cleanup can quickly ruin the experience.
The good news? With the right preparation and a few professional techniques, anyone can master a chocolate fountain. From choosing the best chocolate to preparing delicious dipping foods and cleaning the machine afterward, this guide covers everything you need to know.
Let’s dive in and learn how to use a chocolate fountain like a true pro.
What Is a Chocolate Fountain?
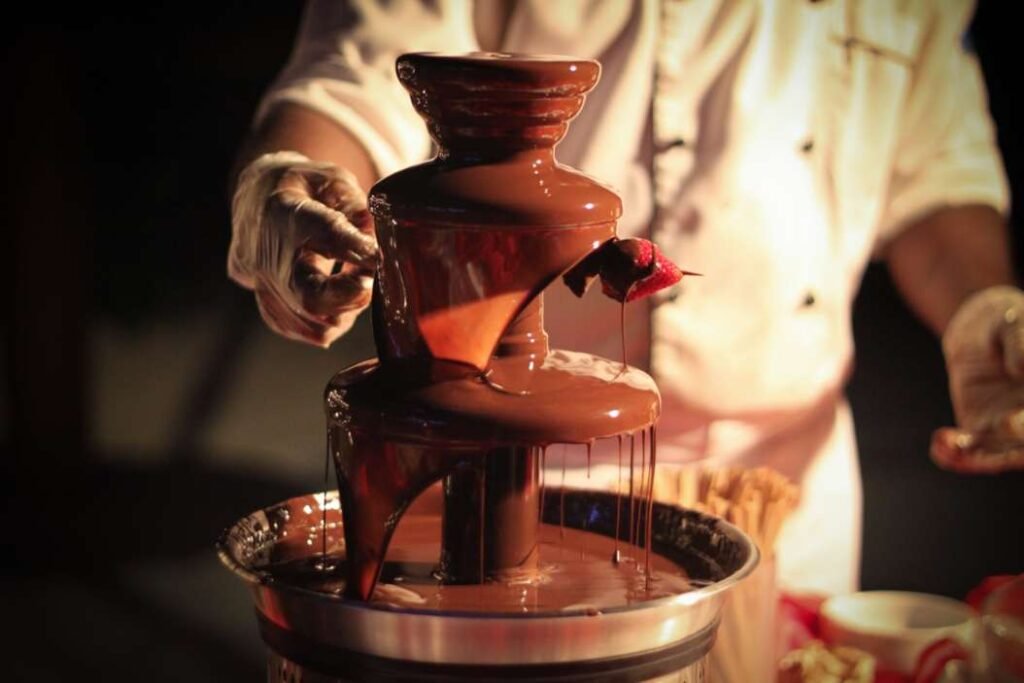
A chocolate fountain is an electric appliance designed to continuously circulate melted chocolate over cascading tiers. A rotating auger inside the fountain lifts the chocolate to the top, allowing it to flow downward in smooth, elegant sheets.
Unlike ordinary chocolate bowls or fondue pots, a chocolate fountain creates an eye-catching centerpiece while keeping chocolate warm throughout the event.
It’s commonly used for:
- Weddings
- Birthday parties
- Graduation celebrations
- Corporate events
- Bridal showers
- Baby showers
- Holiday dinners
- Dessert buffets
- Catering services
- Family gatherings
Why People Love a Chocolate Fountain
There are plenty of reasons a chocolate fountain remains one of the most popular dessert attractions.
Some of the biggest advantages include:
- Creates an interactive dessert station
- Looks elegant on any dessert table
- Serves many guests at once
- Works with dozens of dipping foods
- Makes entertaining easier
- Adds a luxurious touch to parties
- Great for both children and adults
Instead of serving a simple dessert, you’re creating an experience everyone remembers.
Choosing the Right Chocolate Fountain
Not every fountain is built for the same purpose. Before purchasing or renting one, consider the following.
| Feature | Small Fountain | Medium Fountain | Large Fountain |
|---|---|---|---|
| Guests | 10–25 | 30–60 | 75+ |
| Chocolate Capacity | 2–4 lbs | 5–8 lbs | 10+ lbs |
| Best For | Home parties | Events | Weddings & catering |
| Portability | Excellent | Good | Moderate |
When selecting a chocolate fountain, look for:
- Stainless steel construction
- Quiet motor
- Adjustable temperature control
- Stable base
- Easy assembly
- Dishwasher-safe removable parts
- Reliable auger system
Higher-quality fountains generally provide smoother chocolate flow and easier maintenance.
The Best Chocolate for a Chocolate Fountain
One of the biggest mistakes beginners make is using regular chocolate bars without adjusting the consistency.
Professional-quality fountain chocolate contains extra cocoa butter, making it flow perfectly.
Popular options include:
- Milk chocolate
- Dark chocolate
- White chocolate
- Belgian chocolate
- Couverture chocolate
- Premium melting chocolate
- Fountain chocolate
- Gourmet chocolate
If you’re using regular chocolate chips or baking chocolate, you’ll usually need to add vegetable oil, coconut oil, or cocoa butter.
A common ratio is:
- 5 pounds chocolate
- 1 cup vegetable oil
Always follow your fountain manufacturer’s recommendations.
Preparing the Chocolate Properly
Never pour solid chocolate directly into a chocolate fountain.
Instead:
- Chop chocolate into small pieces.
- Melt it using:
- Microwave
- Double boiler
- Chocolate melter
- Stir until smooth.
- Remove all lumps.
- Maintain a silky consistency.
Properly melted chocolate should pour easily like warm honey.
If it’s too thick, add a little more oil.
If it’s too thin, add additional melted chocolate.
Setting Up Your Chocolate Fountain
Proper setup is the secret behind smooth operation.
Step 1: Find a Flat Surface
Your fountain must sit completely level.
Even a slight tilt can interrupt the chocolate flow.
Step 2: Assemble Carefully
Follow the manufacturer’s instructions.
Install:
- Base
- Auger
- Center tube
- Tiers
- Top cap
Double-check that everything locks securely.
Step 3: Preheat
Turn on the heating function for about five minutes before adding chocolate.
This keeps the chocolate from hardening inside the machine.
Step 4: Add Melted Chocolate
Slowly pour the chocolate into the basin.
Turn on the motor only after the chocolate reaches the proper level.
Within a minute, the chocolate should begin cascading down the tiers.
How Much Chocolate Do You Need?
The amount depends on the fountain size.
| Fountain Size | Chocolate Needed |
| Small | 2–4 lbs |
| Medium | 5–8 lbs |
| Large | 8–12 lbs |
Never underfill the basin.
Most fountains require a minimum amount to circulate properly.
Best Foods for Dipping
One reason a chocolate fountain is so popular is the endless variety of dipping foods.
Fresh Fruit
- Strawberries
- Pineapple
- Banana slices
- Apple wedges
- Grapes
- Kiwi
- Orange segments
- Pear slices
- Cherries
- Mango
Sweet Treats
- Marshmallows
- Brownies
- Pound cake
- Sponge cake
- Donuts
- Rice cereal treats
- Cookies
- Biscotti
- Waffles
- Mini pancakes
Savory Options
Many people enjoy sweet and salty combinations.
Try:
- Pretzels
- Potato chips
- Crackers
- Salted breadsticks
Specialty Items
You can also serve:
- Cheesecake cubes
- Cream puffs
- Macarons
- Coconut bites
- Biscuit sticks
- Mini muffins
Tips for Perfect Chocolate Flow
Professionals follow a few simple habits.
Keep Chocolate Warm
Cold chocolate thickens quickly.
Always maintain the proper temperature.
Avoid Water
Even a small amount of water can cause chocolate to seize.
Make sure all utensils remain completely dry.
Stir Occasionally
Stir the basin gently during longer events.
This keeps the texture consistent.
Add Chocolate Slowly
If you need more chocolate, melt it first.
Never add solid pieces directly into the fountain.
Common Chocolate Fountain Problems
Even experienced hosts occasionally run into issues.
Chocolate Won’t Flow
Possible causes:
- Chocolate too thick
- Not enough oil
- Machine not preheated
- Low chocolate level
Solution:
Thin the chocolate slightly and check the temperature.
Chocolate Splashes
Usually caused by:
- Uneven surface
- Too much chocolate
- Incorrect assembly
Level the fountain before restarting.
Fountain Stops Working
Possible reasons:
- Chocolate hardened
- Auger blocked
- Motor overloaded
Turn the machine off, clean the blockage, and restart.
Chocolate Fountain Safety Tips
Safety matters, especially around children.
Follow these precautions:
- Place the fountain away from table edges.
- Supervise young children.
- Use long skewers instead of fingers.
- Never touch moving parts.
- Avoid overloading the electrical outlet.
- Keep cords secure.
A little planning prevents accidents.
Keeping Your Dessert Table Organized
Presentation makes a huge difference.
Arrange food in separate bowls around the fountain.
Label dipping items when serving large groups.
Provide:
- Bamboo skewers
- Small dessert plates
- Napkins
- Wet wipes
- Trash container
Organizing everything beforehand keeps guests moving smoothly.
Cleaning Your Chocolate Fountain
Cleaning becomes much easier if you don’t wait until the chocolate hardens.
Step 1
Turn off the fountain.
Allow it to cool slightly.
Step 2
Remove leftover chocolate.
Store reusable chocolate if desired.
Step 3
Disassemble removable parts.
Step 4
Wash with warm, soapy water.
Step 5
Dry every component completely before storage.
Never immerse the motor base in water.
Always wipe it with a damp cloth.
Pro Tips for Large Events
If you’re serving dozens of guests, planning becomes even more important.
Professional caterers recommend:
- Prepare extra melted chocolate.
- Cut fruit shortly before serving.
- Refrigerate fruit until needed.
- Refill dipping foods regularly.
- Rotate serving trays.
- Keep backup skewers available.
- Monitor chocolate consistency every 20 minutes.
These small habits make your dessert station look fresh throughout the event.
Creative Chocolate Fountain Ideas
Want to impress your guests?
Try themed dessert stations.
Holiday Party
- Gingerbread cookies
- Peppermint marshmallows
- Candy canes
- Strawberries
Wedding Reception
- Elegant fruit display
- Gourmet cookies
- Champagne-colored decorations
- White chocolate
Kids’ Birthday Party
- Colorful marshmallows
- Mini donuts
- Brownie bites
- Banana slices
Romantic Date Night
- Fresh strawberries
- Cheesecake cubes
- Dark chocolate
- Shortbread cookies
Mistakes to Avoid
Many beginners make the same errors.
Avoid these common mistakes:
- Using unmelted chocolate
- Adding water
- Overheating chocolate
- Underfilling the fountain
- Using low-quality chocolate
- Skipping preheating
- Ignoring manufacturer instructions
- Serving wet fruit
- Leaving chocolate unattended
- Waiting too long to clean
Learning from these mistakes makes every future event much smoother.
Final Thoughts
A chocolate fountain isn’t just another dessert appliance—it’s a centerpiece that brings people together. With the right chocolate, careful preparation, proper setup, and regular maintenance, you can create a beautiful display that guests will remember long after the party ends.