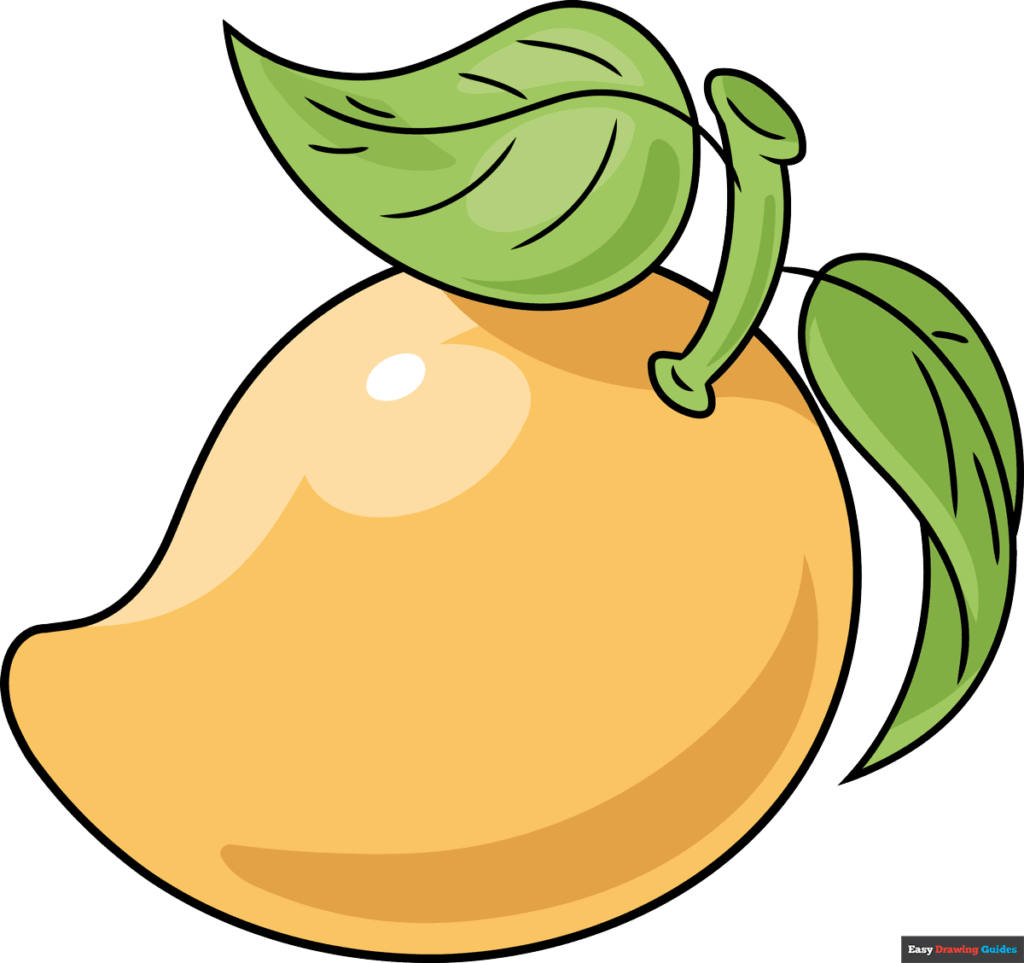
Drawing fruits is one of the best ways to improve observation skills, shading techniques, and artistic confidence. Among all fruits, the mango stands out because of its unique shape, smooth skin, vibrant colors, and natural highlights. Whether you’re a beginner learning basic sketching techniques or an experienced artist looking to refine realistic fruit illustrations, mastering a mango drawing can be both enjoyable and rewarding.
The beauty of drawing a mango lies in its simplicity. At first glance, it may seem like a basic fruit, but when you study its curves, textures, shadows, and color transitions, you’ll discover countless details that bring the artwork to life. A realistic mango sketch teaches valuable lessons about light, form, depth, and texture.
In this detailed guide, you’ll learn exactly how to create a realistic mango drawing step by step. From preparing your materials to adding the final highlights, every stage is explained clearly so you can achieve professional-looking results.
Why Practice Mango Drawing?
Many artists begin their realism journey with fruits because they offer manageable shapes while teaching essential drawing fundamentals.
Benefits of practicing a mango drawing include:
- Improves hand-eye coordination
- Develops shading skills
- Teaches realistic texture rendering
- Enhances observation abilities
- Builds confidence in fruit illustration
- Strengthens understanding of light and shadow
- Improves color blending techniques
- Helps artists learn organic forms
Additionally, mangoes provide interesting color variations, making them excellent subjects for both pencil drawing and colored artwork.
Materials You Need
Before starting your mango drawing, gather the right materials.
| Material | Purpose |
|---|---|
| Sketchbook or drawing paper | Base surface |
| HB pencil | Initial outline |
| 2B pencil | Light shading |
| 4B or 6B pencil | Deep shadows |
| Eraser | Corrections and highlights |
| Blending stump | Smooth shading |
| Colored pencils | Optional color rendering |
| Sharpener | Fine details |
Good-quality materials help create cleaner lines and smoother shading transitions.
Understanding the Shape of a Mango
Before drawing, spend a few minutes observing a real mango or a reference image.
Key Characteristics
A mango typically has:
- An oval shape
- A slightly pointed bottom
- One side fuller than the other
- Gentle curves
- Smooth surface texture
- Subtle bumps and natural imperfections
Understanding these features helps make your mango drawing more realistic.
Step 1: Create the Basic Outline
Start with light pencil strokes.
Sketch the Overall Shape
Draw:
- A large oval.
- Narrow one end slightly.
- Add a gentle curve on one side.
- Create a subtle point at the bottom.
Avoid making the fruit perfectly symmetrical because real mangoes have natural irregularities.
At this stage, focus only on proportions and overall form.
Common Mistake
Many beginners create a perfectly round shape. However, a realistic mango drawing should capture the fruit’s asymmetrical character.
Step 2: Refine the Contours
Once the basic shape is complete, refine the edges.
Adjust the Curves
Look carefully at your reference.
Add:
- Slight bulges
- Natural dents
- Soft contour variations
- Stem attachment area
These small details make the fruit appear authentic rather than cartoonish.
Check Proportions
Ask yourself:
- Is one side fuller?
- Does the bottom taper correctly?
- Is the top rounded naturally?
Making corrections now saves time later.
Step 3: Draw the Stem Area
The stem may seem insignificant, but it adds realism.
Sketch the Stem
Create:
- A small stem attachment point
- Slight indentation around the stem
- Tiny wrinkles if visible
This area often catches shadows and helps define the fruit’s structure.
A realistic mango drawing benefits greatly from these subtle details.
Step 4: Identify the Light Source
Before shading, decide where the light is coming from.
For example:
- Top left
- Top right
- Direct front
- Side lighting
This decision determines where highlights and shadows will appear.
Why It Matters
Without a consistent light source:
- Shadows look confusing
- Form appears flat
- Realism decreases
Professional artists always establish lighting before detailed shading.
Step 5: Begin Light Shading
Now the mango starts gaining volume.
Apply Midtones
Using an HB or 2B pencil:
- Shade lightly across the fruit
- Leave highlight areas untouched
- Follow the fruit’s curvature
Use smooth strokes rather than harsh lines.
At this stage, your mango drawing should begin looking three-dimensional.
Step 6: Build Form Through Layering
Realistic drawings are created gradually.
Add Additional Layers
Darken:
- Areas opposite the light source
- Lower sections
- Curved sides
Use multiple light layers rather than pressing hard immediately.
This creates smoother tonal transitions.
Blending Tips
A blending stump can help:
- Smooth graphite
- Remove rough pencil marks
- Create realistic gradients
However, avoid over-blending because some visible texture adds realism.
Step 7: Create Deep Shadows
Shadows define shape and depth.
Where to Place Dark Values
Focus on:
- Underside of the mango
- Stem indentation
- Side opposite the light
- Cast shadow area
Use a 4B or 6B pencil for darker values.
The contrast between highlights and shadows makes a mango drawing appear realistic.
Step 8: Add Surface Texture
Although mango skin looks smooth from a distance, it contains subtle texture.
Observing the Surface
Look for:
- Tiny pores
- Small color variations
- Slight imperfections
- Natural blemishes
Drawing Texture
Use:
- Light stippling
- Soft pencil dots
- Gentle irregular marks
Keep texture subtle.
Too much texture can make the fruit look rough instead of smooth.
Step 9: Draw Realistic Highlights
Highlights represent reflected light.
Preserve Bright Areas
Use an eraser to:
- Lift graphite
- Create soft highlights
- Refine reflective spots
Natural highlights often appear:
- Near the light source
- Along curved surfaces
- On glossy areas
A realistic mango drawing depends heavily on accurate highlights.
Step 10: Create the Cast Shadow
Many artists forget this crucial step.
Why Cast Shadows Matter
Without a cast shadow:
- The fruit appears floating
- Depth is reduced
- Realism suffers
Drawing the Shadow
Consider:
- Light direction
- Surface angle
- Shadow softness
Keep edges sharper near the mango and softer farther away.
This creates a convincing sense of space.
Adding Color to Your Mango Drawing
If you’re working with colored pencils, this is where the fruit truly comes alive.
Common Mango Colors
Depending on variety, mangoes may include:
- Yellow
- Green
- Orange
- Red
- Golden hues
Layer Colors Gradually
Start with:
- Yellow base layer
- Orange transitions
- Green sections
- Red blush areas
Blend carefully to avoid harsh color boundaries.
Color Blending Techniques
Useful methods include:
- Layering
- Burnishing
- Circular strokes
- Light pressure application
These techniques help create realistic fruit art.
Advanced Shading Techniques
Artists aiming for professional realism can use advanced methods.
Cross-Hatching
Cross-hatching creates depth through intersecting lines.
Benefits:
- Better control
- Interesting texture
- Enhanced contrast
Gradient Shading
Gradients are essential for smooth fruit surfaces.
Practice:
- Light-to-dark transitions
- Consistent pressure control
- Soft tonal changes
A polished mango drawing often relies on excellent gradient work.
Common Mistakes to Avoid
Even skilled artists make mistakes.
Making the Outline Too Dark
Heavy outlines can flatten the drawing.
Instead:
- Use soft edges
- Let shading define form
Ignoring Reference Images
Memory-based drawing often leads to inaccuracies.
Always observe:
- Shape
- Texture
- Lighting
- Color
Over-Blending
Excessive blending can remove texture and make the artwork appear artificial.
Incorrect Shadow Placement
Shadows must align with the chosen light source.
Consistency is crucial.
Tips for Making Your Mango Drawing Look Realistic
Study Real Mangoes
Nothing replaces direct observation.
Notice:
- Surface reflections
- Natural color shifts
- Shape variations
Work Slowly
Realism requires patience.
Build:
- Layers
- Values
- Texture
Gradually.
Compare Frequently
Step back regularly.
Check:
- Proportions
- Contrast
- Symmetry
- Perspective
Increase Contrast
Many beginner drawings appear flat because values are too similar.
Strong highlights combined with deep shadows create depth.
Mango Drawing Ideas for Practice
Once you’ve mastered a single fruit, try more challenging compositions.
Beginner Ideas
- Single mango sketch
- Simple pencil outline
- Colored mango illustration
Intermediate Ideas
- Mango with leaves
- Mango slice drawing
- Two mangoes together
- Basket of fruit
Advanced Ideas
- Hyper-realistic mango art
- Water droplets on mango skin
- Detailed botanical illustration
- Mango still life composition
These projects improve artistic skills while keeping practice enjoyable.
Benefits of Drawing Fruits Regularly
Fruit studies remain popular among artists for good reason.
Skills Developed
Regular fruit drawing helps improve:
- Observation
- Shading
- Composition
- Proportion
- Texture rendering
- Light analysis
- Pencil control
- Color theory
A detailed mango drawing combines all these artistic fundamentals into a single project.
Final Thoughts
Creating a realistic mango drawing is an excellent exercise for artists at every skill level. It combines essential artistic principles such as observation, proportion, shading, texture, contrast, and color blending into one enjoyable project. While the process may seem challenging at first, each step builds upon the previous one, making the entire experience manageable and rewarding.
The secret to a successful mango drawing is patience. Take time to study the fruit, observe how light interacts with its surface, and gradually build your values from light to dark. Small details like subtle texture, accurate highlights, and realistic shadows can transform a simple sketch into a lifelike piece of art.